| First of all, you need to get
yourself some equipment. I advise you to search the internet for
"EPROM Programmer" and do some research yourself. There are literally hundreds
of brands of EPROM programmers that will do the job, however I personally
recommend the following models...
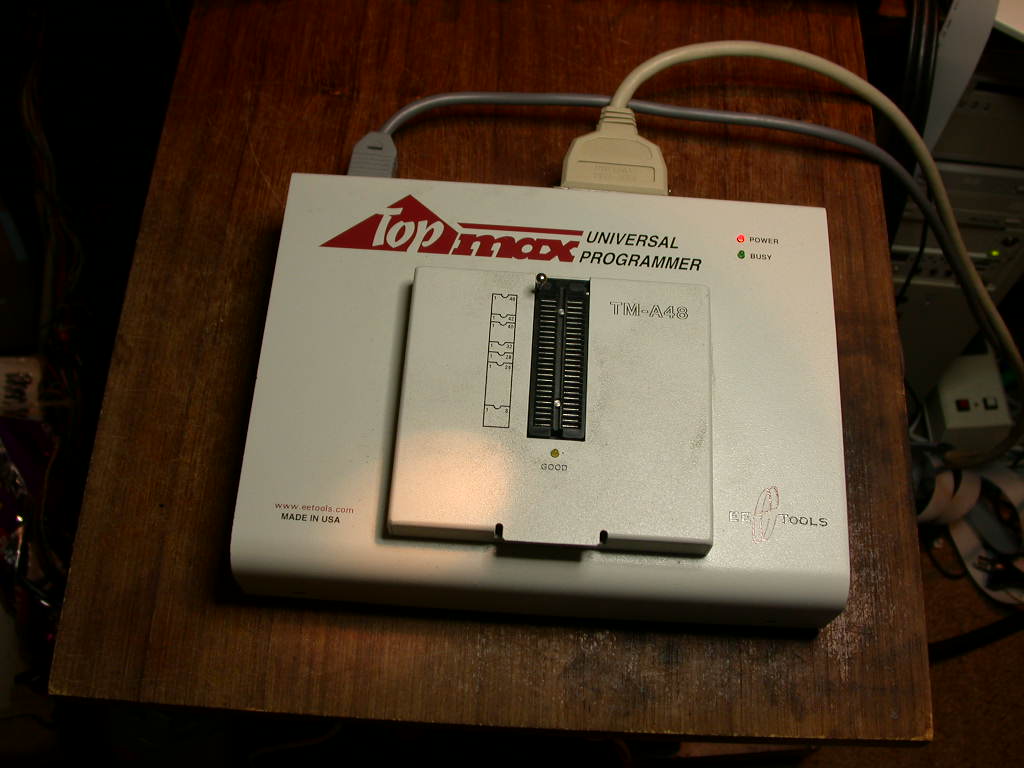
EETools - TopMAX & TopMAX II. Expensive, but
powerful. Very very good software and good support with a forum.
Hilo Systems - ALL-11P3 or ALL-100. Again expensive, but powerful!
BP Micro 1400/84 - obsolete now but VERY powerful! Any BP Micro programmer is good.
Andromeda Research Labs - The EPROM+ with
the DIP40/42 modules (very nice price!)
You can buy any EPROM programmer that covers the majority of devices used on
arcade PCB's. There is no limit on how much you can spend to buy one of these
devices. You can buy a cheap TL866 on ebay for less than $50, or spend more like $150,
$400 or you can buy the latest and greatest whizbang DataIO Unisite for
$35000. (Note: DO NOT buy the Unisite, it's an overly complex piece of junk with an archaic and non-free software updating method that locks you into old technology.... PS, anyone want to buy a cheap Data I/O Unisite ;-)
It just depends on how much you want to spend, your level of dedication and what type of chip you want to program. These can be bought from local Electronics shops, EBay, over
the internet from many, many places or directly from the manufacturer or
distributor. The key is research. Arcade PCB's use some
of the most sophisticated technology on the market today, so do yourself a
favor and look around first before you buy a lemon that can't dump your PCB.
I don't recommend you buy a PC-Based programmer. That is, one that has a card
that plugs into the PC. These are usually cheaper and less capable or require an
older PC, usually DOS-based. Those
home-made jobs are usually unsatisfactory too, except for really simple tasks,
so avoid those aswell.
Be sure to check that the programmer has at least a 42 pin ZIF (Zero
Insertion Force) socket, otherwise you'll be cursing yourself for buying it when
you find yourself needing to read some of the larger EPROMs that are found on
arcade PCBs.
Also be sure to check that the programmer has the capability to read BIPOLAR
PROMs (e.g. 82S123 / 82S129 etc). These are the tiny chips that usually hold
color tables and such. If you don't dump those, the emulation will suffer due to
the lack of the data held in these PROMs. Note if you only need to read PROMs you can make a simple adapter to read the PROM as an EPROM or buy a pre-made adapter.
Just remember, the unit you buy must be able to do everything you want to do,
otherwise it's a waste of money.... and as they say "You get what you pay for"
so don't skimp on quality if you can avoid it ;-)
Visit the manufacturers' web site and look for a device listing of the supported devices. The basic supported devices should be at least....
2716, 2732, 2764, 27128, 27256, 27512, 27010, 27020, 27040, 27080, 27C1024,
27C2048, 27C4096, 574200,
578200, 27C160 and 27C322, plus BIPOLAR PROMs type 82S123 and 82S129. Of course, there are MANY equivalent types that I didn't list, but most are compatible with these I've listed above. If it has these devices supported, it's probably good enough for most of the PCB's that you will come across.
Some others you could consider are....
Dataman - S4 or 48XP models
Data IO - Plus 48
Labtool - 48XP
Leap Electronic - Leaper-48
Elnec - Labprog or Beeprog
Xeltec - Superpro 280U or Superpro 580U or
Superpro 3000U
Logical Devices
- Chipmaster 6000XP or Chipmaster5800U
BP Micro - BP-1400/240; probably quite
expensive (UPDATE: In fact yes, it's US$5000), uses 100's of modules that replace the entire socket
(and substantially lower your bank balance too!) and can drive up
to 240 pins of every known type of chip on the market. A very powerful little gizmo!
Willem Programmer - A cheap kit based unit (~50 Euros) which is good enough for reading and programming EPROMs
up to 4M (32 pins).
TOP 2048 (made in China?) and several others - Seems to have good support, ZIF48 socket, English s/w and reasonable price too!
All of the Needhams EMP-1x/2x/3x units do not support ANY Bipolar PROMs, so DO NOT BUY ONE ;-)
Also note most cheap programmers don't support PROMs either! So avoid those if you need to program PROMs.
If you're looking to buy some EPROMs or PROMs to program, there are plenty of
places on the net. Just use Google and search 'buy EPROM'.
A few examples are.....
Jameco Electronics
Mouser Electronics
Digi-Key
Ebay
If you have a programmer or supplier that you would like to recommend, please
let me know and I'll add it to the list :-)
Ok, I could go on and on, but I'm not getting any commission from this, so
these will do for now ;-)
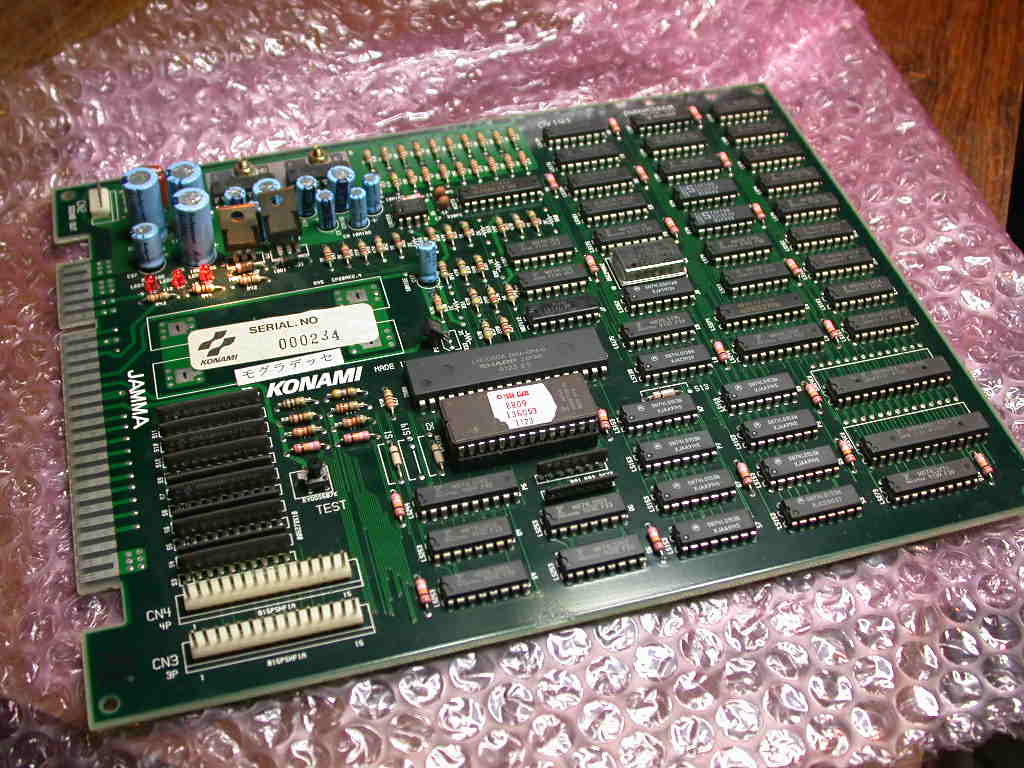
So now you have a shiny new EPROM Programmer. What next? Well, get
yourself a PCB. Here's a simple example....

Look closely at that pic. Looking for dumpable components is the key to
success and will come with experience.
I'm sure you've spotted the EPROM....

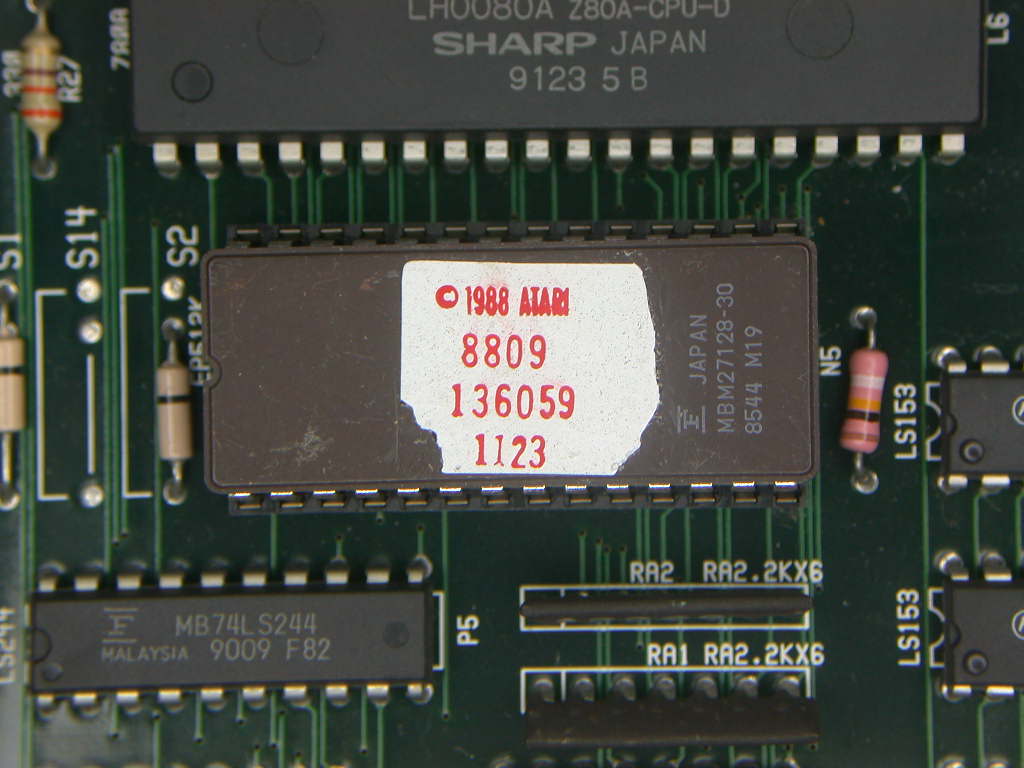
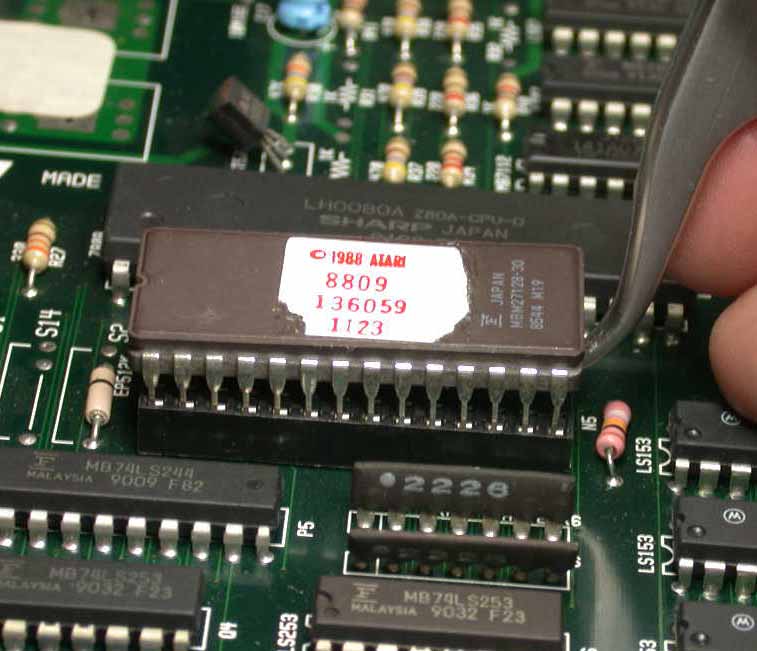
Look even closer.....

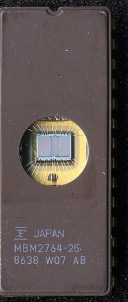
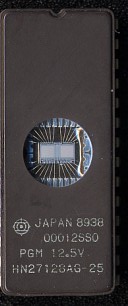
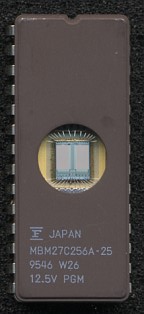
As you can see, this one is clearly marked as MBM27128. That is the "type"
and size of the EPROM. This one is 128k and the dump will be 128 / 8 = 16k, or
16384 bytes. For the purposes of this example, generally most EPROMs are 8 bit,
so the size of the chip in K is usually divided by 8 to give it's capacity,
though you don't need to be concerned with that :-)
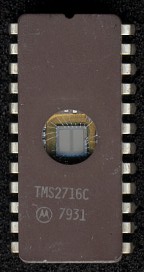
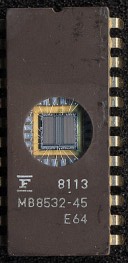
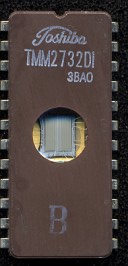
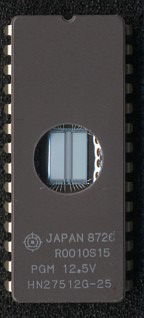
You'll also note the large "F" and the "MBM". That is the manufacturers' symbol
and code. This
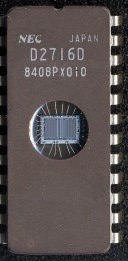
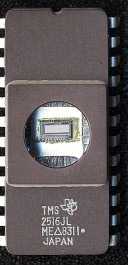
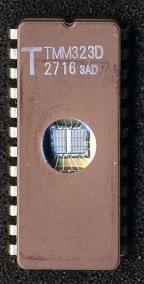
particular ROM is made by Fujitsu. You should try to learn the different types
of EPROMs and manufacturers' symbols and EPROM codes so you can more easily recognise the
correct type. If you read it as the wrong type, it's possible you can damage
the contents which would be catastrophic on a rare PCB ;-)
Some common ones are....
| Manufacturer |
Code |
Symbol |
| Actel (CPLD and FPGA) |
|
 |
| Altera (CPLD and FPGA) |
|
 |
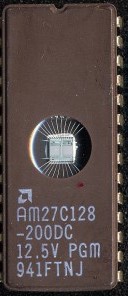
| AMD |
AM |
 |
| Atmel |
AT |
 |
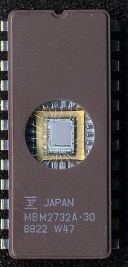
| Fujitsu |
MB or MBM |
 |
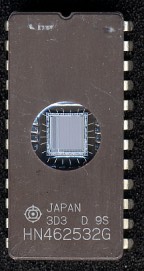
| Hitachi |
HN |
 |
| Intel |
D or i |
 , ,
 |
| Intersil (Bipolar PROMs) |
|
 , ,
 , ,
 |
| Lattice (PALs/GALs) |
|
 , ,
 , ,
 |
| Macronix |
MX |
 |
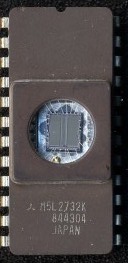
| Mitsubishi |
M (or M5?) |
 |
| Monolithic Memories (Biploar PROMs) |
|
 |
| National |
NM |
 , ,
 |
| Oki |
M |
 , ,
 |
| NEC |
uPD or D |
 , ,
 |
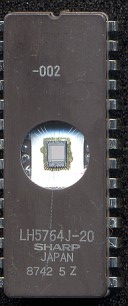
| Sharp |
LH |
 |
| Signetics (now Philips, Bipolar PROMs) |
|
 |
| Sony |
CXK |
 |
| Silicon Storage Technology |
|
 |
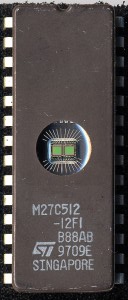
| ST Microelectronics |
ST |
 , ,
 |
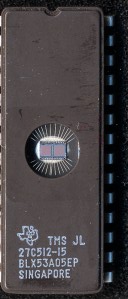
| Texas Instruments |
TMS |
 , ,
 |
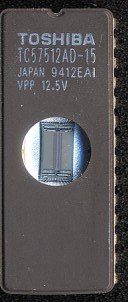
| Toshiba |
TC |
 , ,
 , ,
 |
You can find a good cross-reference of EPROM and PROM types at
The 'Wiretap' Arcade Game Collector's
Archive, which was created by Al Kossow.
Update:
Sadly, it seems that archive is no longer online, so I've mirrored those
cross-reference files here....
ROMref.txt - comparison list of EPROMs and equivalents.
PROMref.txt - comparison list of PROMs and
equivalents.
Or google for 'PROM Ref' or 'ROM Ref' etc
Also, you can find a nice page with MANY manufacturers symbols
here.
Note this is a dead link now but you can find them using google :-)
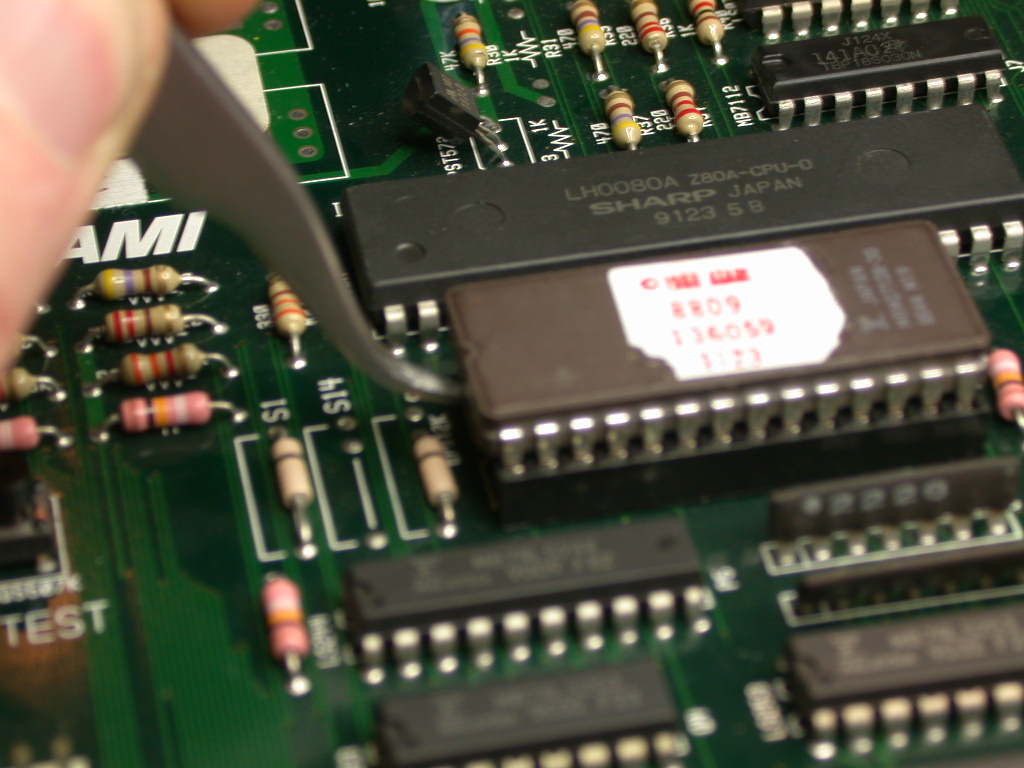
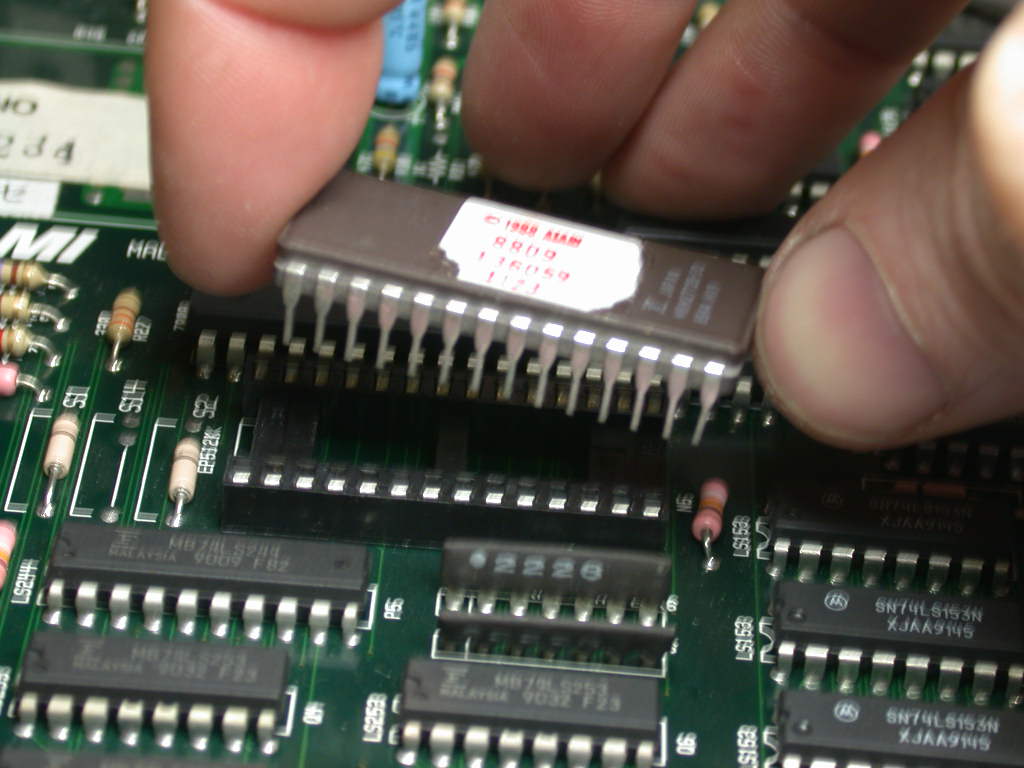
Now that we have located the victim, err... EPROM, we need to remove it. For
the most part, ROMs are in sockets and are easily removed by inserting a small
flat-bladed screwdriver or other similar tool under the side of the chip and
gently levering it upwards, just slightly like this....
 and a little bit more...

Here you can see I'm using a special tool that I made myself. Lever upwards
VERY GENTLY. I can not stress this point enough. If you damage the EPROM or
break off a leg, you'll be in some serious trouble which will require
professional help to repair it. Also DO NOT dig your screwdriver into the PCB or you will damage the board and your game will no longer be working!
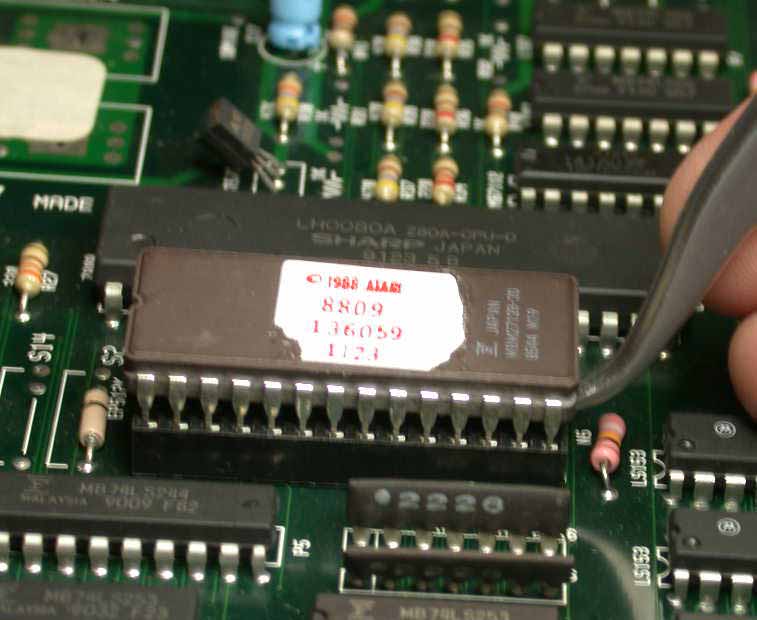
Lever the other side gently upwards too, just slightly.....
 and a little bit more...

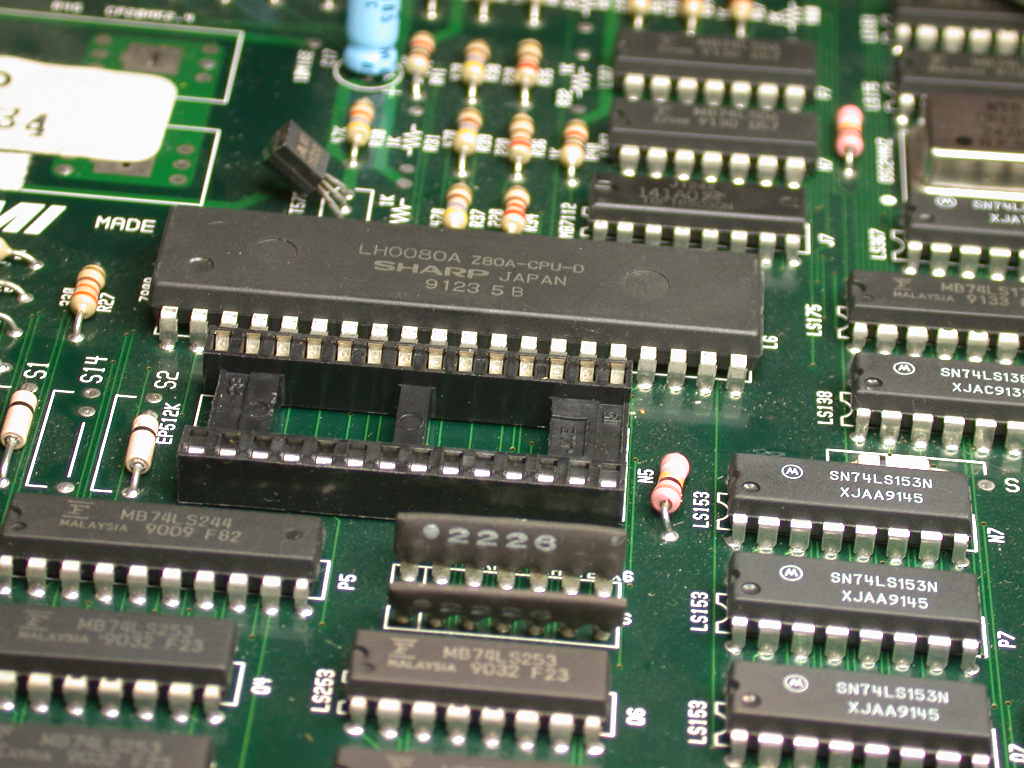
Continue levering both sides _evenly_ until the EPROM is loose from it's
socket and you can lift it out....
 No more EPROM.... Magic!

Right, now that you have that EPROM in your hand, what do you do with it?
Well, fire up your trusty EPROM programmer....

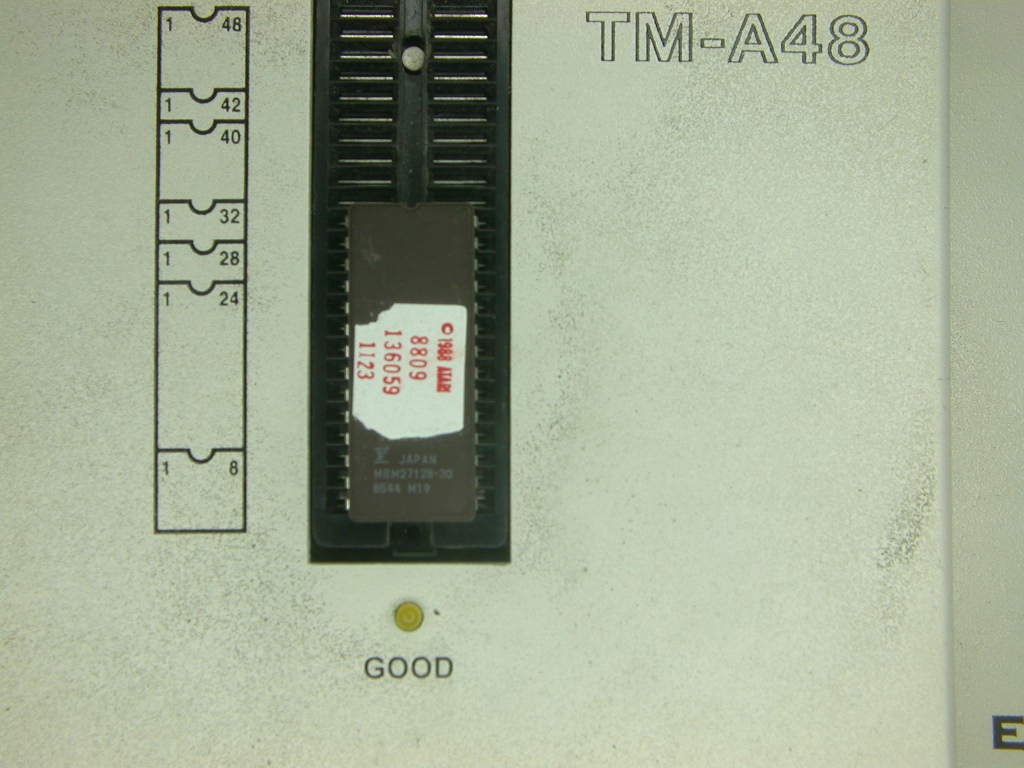
Next put the EPROM you just extracted into it's ZIF socket
 and close the lever...
 noting the orientation of it.
Be sure to align the EPROM correctly. There is a notch or indentation near
the top that marks pin 1. This pin should always be pointing towards the top of the ZIF
socket, but the lowest pins always sit at the bottom of the socket. Check the pic if you're not sure what I mean. Also note that some
EPROM programmers require the chip be sitting at the very top of the ZIF socket. Check the EPROM programmer and it's accompanying
documentation to know for sure how the EPROM should be socketed. Be VERY VERY sure you get it right. If you put it in the wrong way, you
will blow it up. There is no 2nd chance, it will blow up and you'll have a
dead EPROM. Double... no triple check it, to be sure, to be sure, to be sure.
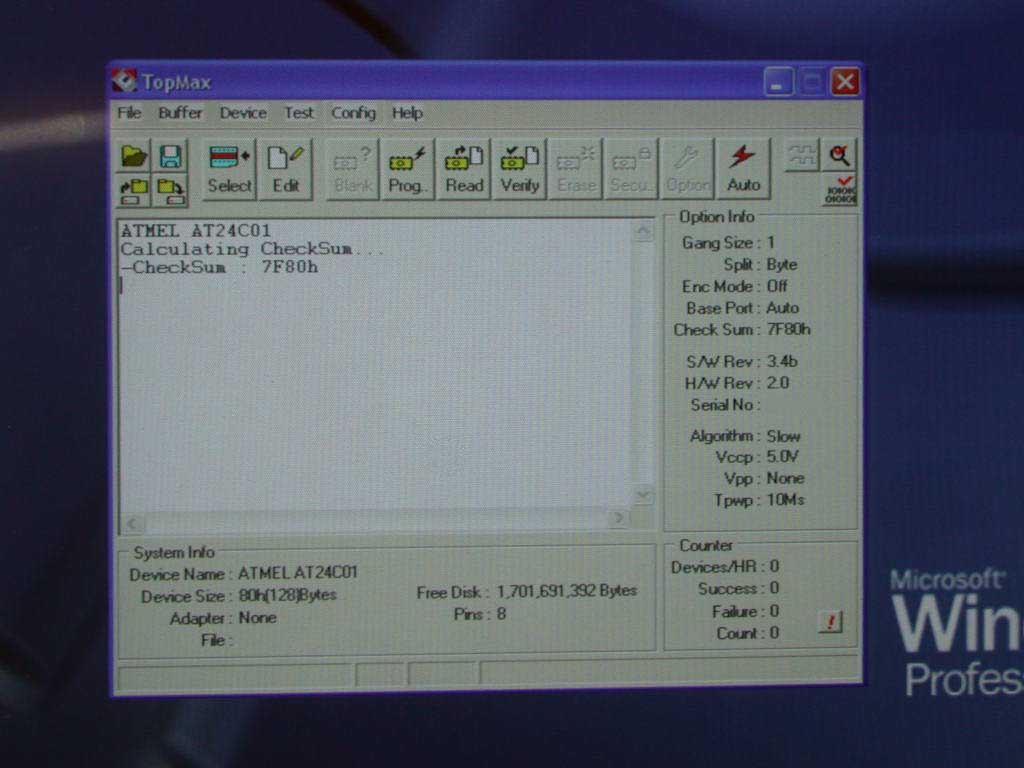
Next step is load the software that came with your EPROM programmer....

This will vary of course depending on your system and which software you
have. Once loaded, you are greeted with the main program window....

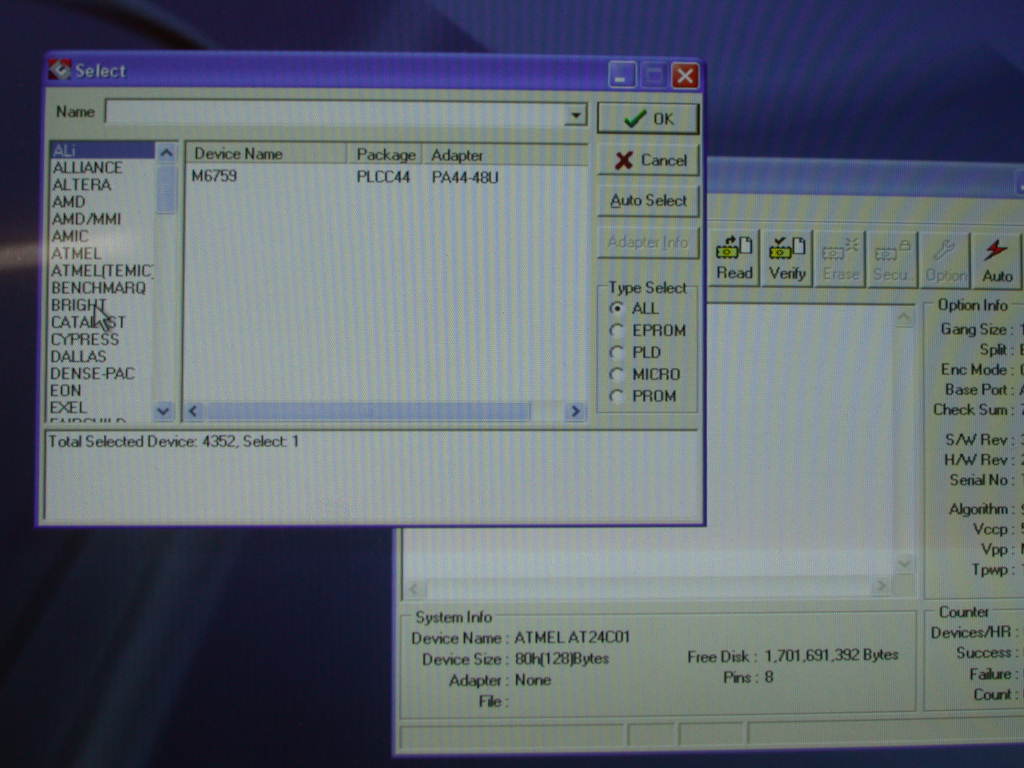
Navigate your software to select the device. You should see a window
containing many manufacturers and devices similar to this....

You need to select the correct type of chip. In our example we already know
it's a Fujitsu chip, so select the manufacturer as Fujitsu first....
 and then the type from the list in the right column...
 and click OK (or select it some way using the menu or whatever options your
program has)
and click OK (or select it some way using the menu or whatever options your
program has)
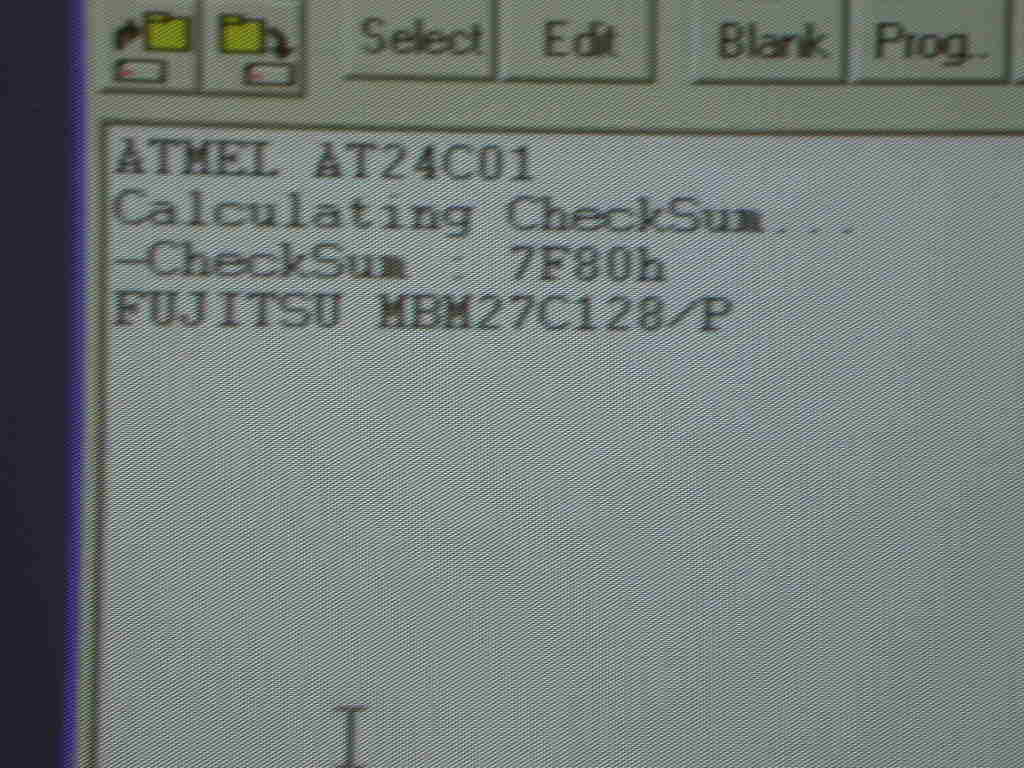
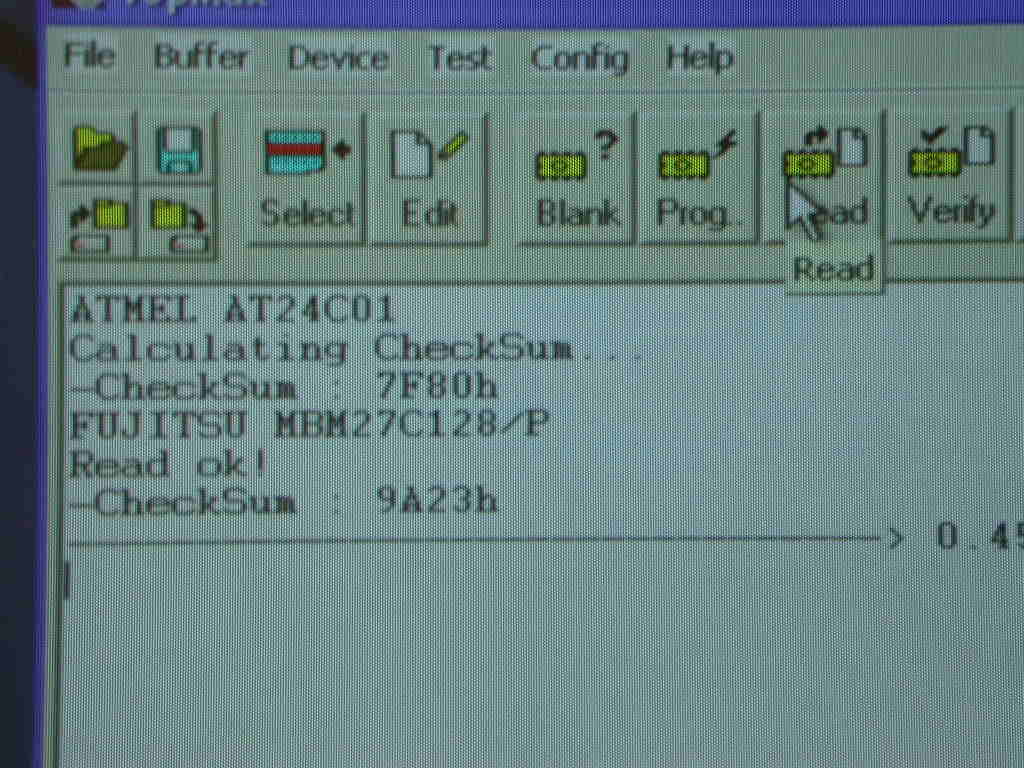
Now the main screen will say the current device is Fujitsu MBM27128....

Now we need to read it. This is done by selecting the "read" option in your
software. Click that and after a few seconds, you'll see a checksum on the
screen....

The EPROM programmer calculates this checksum automatically. It can be used
for a check to know if you have a good read or not. If you get 0000h or ffffh or
some other strange number, you may have a bad EPROM, it could be blank, or you
selected the wrong device in the software.
A common mistake made by people is to rush. Never rush when reading EPROMs,
you will only cause problems. Be sure to read the device at least 3 times. Yes
that's right, 3 times. In between each read, remove the chip from the ZIF socket
then put it back. Sounds dumb? One read is good enough you say.... not so my
friend. The most common problem with reading EPROMs is dirt and corrosion on the
pins that can cause a bad read. If you look at MAME, I'm sure you're aware of
the number of bad reads that are present. If only the original dumper had read
it 3 times to check the read was good... <sigh>
Before I move on, it's worthwhile to mention the other BIG problem with ROM
dumping. The 2nd most common problem is reading ROMs using the wrong size. This
often results in a read that is only half the size of the real chip. This most
often happens when reading unmarked (black) MASKROMs. These chips are
manufactured by many companies but generally, there are a few types that cover
most MASKROMs. The key here is to be sure you select a type with the same
pinout.
- 32 pin chips equivalent to 27C010, 27C020, 27C040 and 27C080. These are
1Meg, 2Meg, 4Meg and 8Meg devices and are 8 bit. To be safe, if you don't know
the size, read the chips as 27C040 or 27C080. A larger dump will just contain
duplicate halves and can be chopped easily.
- 40 pin chips equivalent to 27C1024, 27C2048, 27C4096. These are 1Meg, 2Meg
and 4Meg devices and are 16 bit. If you don't know the size, read these types
as 27C4096. You can also try to read them as the type listed directly below if
you get a read where every second column contains 00's. To check the contents,
use the "edit" option of your EPROM programmer software to view it after
reading.
- 40 pin chips equivalent to 574200 and AM27C400 and HN27C4000. These are manufactured by Toshiba, AMD and Hitachi, respectively, are
4M-bit devices and are 16 Bit also, but the pinout differs from the types above. These are commonly used to hold graphics or sound data.
If you see a 42 pin socket that has 40 pin ROMs in it, you can be sure the 40 pin ROMs are this type because all 42 pin ROMs are pin compatible with these except they have 2 extra pins at the top.
- 42 pin chips equivalent to 578200. These are 8Meg devices and are 16 bit. The ROMs listed above (i.e. AM27C400) have the same pinout
as these ROMs and can be dropped into a socket that has 42 pins where a 40 pin ROM is used. In this case always put the ROM into the lower
end of the socket. Meaning the end where the notch is and the top pins 1 and 42 should be unused. If you put the ROM into the socket using
the top pins 1 and 42 you will blow up the ROM so don't do that. Note this also applies to the ROMs listed below (i.e. 27C160/27C322)... they are electrically and physically interchangeable.
They are commonly used to hold graphics and sound data and are
usually just black with little or no markings. There is another compatible type made by NEC (uPD27C8000) which is also equivalent to
578200. The pinout of these types is almost identical to the ones listed directly below only that there is one less address line (pin 42
has no connection, termed NC). If you know it's an 8M ROM, then read it as one, but if you're unsure, read it as a 27C160. It can be
easily chopped in half afterwards if both halves are duplicated. This type is one of the most commonly misread types. Many bad dumps have
8M images in them that should actually be 16M!
- 42 pin chips equivalent to 27C160 and 27C322. These EPROM equivalents are
only manufactured by ST Microelectronics. This actual EPROM is not very
common on arcade PCBs (though you will find them used a lot on late 90's and
later Sega PCBs), but the MASKROM equivalent is extremely common and is used for holding graphics
and sound data. The majority of bad dumps are of this size range. These chips
are mostly just black, with little or no markings. To be safe, read the chips as
27C322 if you don't know the size. There is one simple way to test these
chips. Check this sample 32M ROM pinout here...

With reference to the above pic, you can see that pin 32 is labelled A20. This
is the address line that enables the chip to access 32MBit of data. Pin 42,
labelled A19, allows the chip to access 16MBits of data and pin 1 labelled
A18, allows the chip to access 8MBits of data. You will never see a 42 pin ROM
hold less than 8MBits. Using a multimeter set to continuity test (or diode
test), check to see if pin 32 is joined to GND or +5V (either use the JAMMA connector, pins 1 and 3
or the power and ground pins of any logic chip on the PCB). If it has a direct
connection to GND or +5V, then the chip is not 32MBit. If it goes somewhere
else (i.e. not to GND or +5v) then the ROM is 32MBit. If pin 32 is joined
to GND or +5v, check pin 42. If pin 42 is also joined to GND or +5v or has no
connection at all to anything else, it's likely the ROM is 8M and you would
read it as a 578200 (you can also read it as a 27C160 and just chop the
resulting saved data in half). If pin 42 does not have a direct connection to
GND or +5V, then the chip is 16MBit and you would read it as a 27C160 EPROM.
See the summary table below for a clearer picture.... checking the pins in
this order...
| How to check the size of 42 pin
MASKROMs |
| Step# |
If pin# |
is tied to... |
the ROM is... |
and you read it as... |
| 1 |
42 |
GND or +5V or NC |
8M |
578200 or 27C8000 |
| 2 |
42 |
anything else (logic or another chip) |
goto step 3 |
|
| 3 |
32 |
GND or +5V or NC |
16M |
27C160 |
| 4 |
32 |
anything else (logic or another chip) |
32M |
27C322 |
You should be aware that PCBs can be wired to accept larger EPROMs but
actaully use lower capacity ones on the board. So in that case, your checking
might reveal that the PCB is set to accept 27C322 EPROMs, but the actual
EPROMs on the PCB are 27C160 or 27C8000 etc. In this case, you read the chips
as 27C322 and use ROMCMP to compare the ROM to see if it has duplicated halves
(more on that below).
- To further complicate matters, there are also 32M MASKROMs that have been
programmed in BYTE mode which if read as a normal 27C322, will result in a bad
read whereby all EVEN bytes are 00. These are commonly used by Konami for the
sound data ROMs. To read these requires an extra read and then interleaving
both reads together using some extra software. It's fairly time consuming to
explain here, if you have this problem when reading 32M sound ROMs, contact me
and I'll explain further :-)
- Try to check the chip to determine the real size. Reading it as the
wrong type will result in a bad read. If you're still not sure, _visually_
inspect the tracks connected to the ROM to see where they go. The key pins are
32 and 42. For example, if you notice there are no tracks leading to pin 32,
you know the ROM is not 32MBit (at least). Reference the table above to
properly identify the ROM.
- You can also purchase
a real EPROM of the size you read the chip as and program it with your data,
then test it on the PCB. If the game works with no faults, you can be fairly
sure your read is ok. DO NOT EVER re-use the original ROM to test your read data. If it doesn't work, then you have lost the actual data. Don't skimp on quality just to avoid buying a few test EPROMs. Test EPROMs are very good and will save your ass one day, believe me ;-)
- The MAME distribution contains a program that is SPECIFICALLY designed to test
new reads. It's called ROMCMP and is able to find many types of errors in binary
files such as duplicated halves, fixed bits (where every second byte is 0),
stuck bits (where there is one (or more) pins that are not touching properly and was not
active during the read, usually caused by dirt or a bent pin) and many other
problems. For example, if you have absolutely no idea what size your 42 pin
MASKROM is, read it as a 27C322. If ROMCMP complains about your data saying it
has duplicate halves or duplicated quarters, then you know the ROM is less
than 32MBit. If there are no messages from ROMCMP, generally the dump should
be OK (assuming you didn't dump it half-size, which can't be checked for).
It's better to read it at 2X the size and discover it's got duplicated halves,
rather than read it at a lower size and find out after emulation begins that
your MASKROM was dumped at half the real size and is bad! And it's even worse
if you no longer have access to the PCB to re-read the chip! Argghh!!
You can find ROMCMP in the regular MAME binary and
source .zips at The Official MAMEDev Home Page.
See the source for further info on using it to test your dumps.
- It's not necessary to read ANY chip as it's specific manufactured type. Any
equivalent type will do as long as the pinout matches (be VERY careful to ensure
the pinout does match or you may damage the ROM!). You can find pinouts for
most chips on the net if you search hard enough ;-)
When reading MASKROMs, you MUST use an equivalent type since they're not
programmable devices at all, they are manufactured with their contents at the
factory. Which is why you don't find any EPROM programmer software containing
MASKROM types and the reason for all the confusion about reading unknown
MASKROMs which results in bad reads.
Ok, well getting back to the subject.....
So what can you do if you get a different read? Assuming you've selected the
correct type of chip in your software, first thing is remove it
from the EPROM programmers ZIF socket and clean the pins. You can do this by getting some very fine
wet & dry sandpaper (around
600 grit, used by smash repair companies when spray-painting cars) and polishing the pins on both sides until it's shiny. Then put
it back and re-read it, again, 3 times. If you still get different reads (this
is where the checksum comes in, note the number on each read....), remove the
EPROM again and carefully clean the insides of each leg too, that is, all the
way around the leg, inside, outside and in-between each leg. It's time consuming
I know, but you should eventually get a good read. If you still get bad reads,
it's possible your EPROM is bad, or it is voltage sensitive and you need to
increase or decrease the voltage by 0.1v to get a good read (you can check your
software to see if it has this option, or ask someone who is more experienced
with these matters to help you). Another trick is to heat up the ROM and read it while it's hot. Use a heatgun or similar to gently heat up the chip to about 60 degrees C (approx 140 degrees F). Use some tongs or pliers or tweezers to pick up the chip and put it into the ZIF socket and then read it. If that doesn't work, give up heating it. Do not think you can heat it more and achieve a result. You will only melt the chip, your EPROM programmer and your fingers and your house will burn down when your EPROM programmer catches fire.
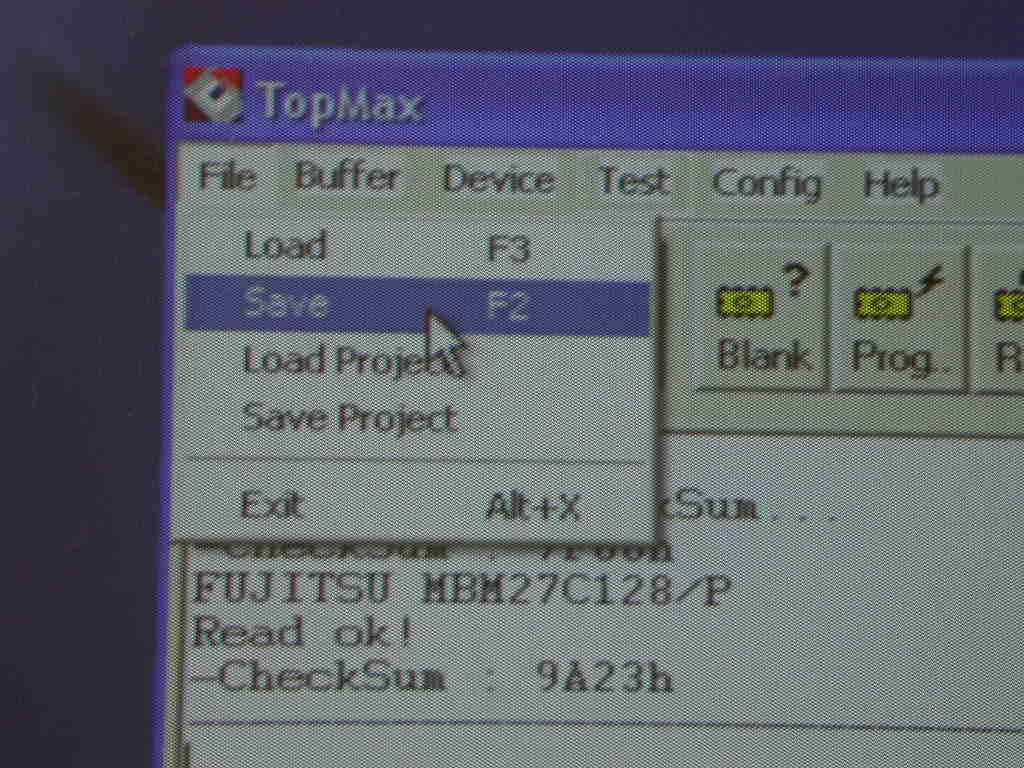
Now that you have read the chip, you need to save it. Select the save option
in your software....
 Your software should have options to save the data as different types (Hex,
Binary, ASCII etc), be sure to save it as RAW BINARY.
Your software should have options to save the data as different types (Hex,
Binary, ASCII etc), be sure to save it as RAW BINARY.
Type a filename to save it as, and click OK....

Make sure you name it properly. That is, use the labelling from the ROM for the name and the location as the extension. For our sample Fujitsu EPROM, the correct name would be 136059.5n. The location is generally found next to the chip (such as IC21, U33), or cross-referenced from the sides of the PCB which has numbers and letters on it (such as 5n, 21t etc).
That's it! You've dumped the EPROM and completed the task.
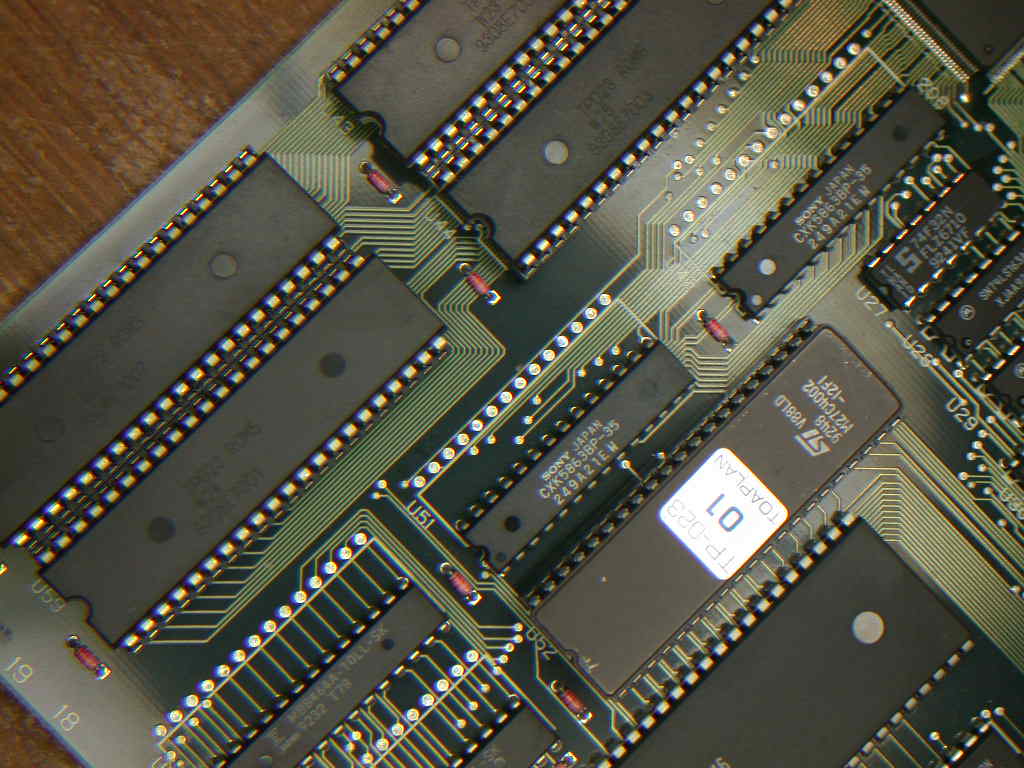
As I stated above, some arcade PCB's can use much more complex ways of
storing their data. You may come across a PCB with many black MASKROMs that are
unmarked and soldered into the PCB, similar to this...

If they are socketed, you can remove them and read them just like any other
EPROM once you identify them. Take note that there could be MANY different types
of ROMs on the PCB which can take you several hours to identify and read (and
check!). Here's a nice example to show you just how complex it can get...
 (This is a Sega Model 3 PCB)
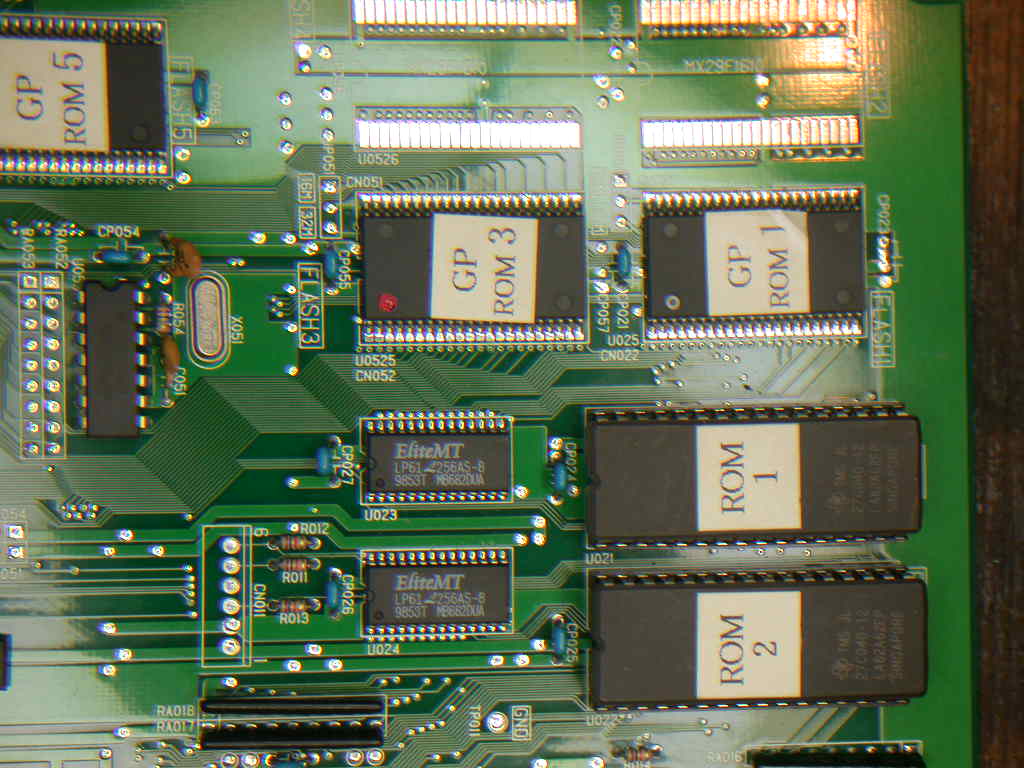
Look carefully at this board. You'll notice some of the MASKROMs are a different
shade of black. Don't be fooled into thinking they are a different size just
because they look different. MASKROMs are manufactured by different companies
and they can look different but still be the same! On the other hand, if they look different
they could actually be different. So you'll need to do some research first to properly identify the chips.
If they are soldered into the PCB, you
should seek professional help to extract them as you can easily damage the fine
tracks on the PCB which will render your PCB non-working and will be extremely
troublesome and expensive to repair.
There are other types such as surface mounted ROMs,
like this....
 and this....
 which are best left to professionals, since you need
a whole pile of specialised and expensive
equipment to read them. For soldered-in MASKROMs and surface mounted ROMs, I
can dump them for you. I will do this for free (as long as the PCB is not
already dumped), you only need to pay for postage
both ways. If you have supported me in the past by loaning me PCB's etc, I will
probably pay for return postage myself providing the item is small ;-) which are best left to professionals, since you need
a whole pile of specialised and expensive
equipment to read them. For soldered-in MASKROMs and surface mounted ROMs, I
can dump them for you. I will do this for free (as long as the PCB is not
already dumped), you only need to pay for postage
both ways. If you have supported me in the past by loaning me PCB's etc, I will
probably pay for return postage myself providing the item is small ;-)
Identifying the many types of EPROMs will come with experience. Just inspect
the PCB for a while and you should be able to pick the EPROMs, MASKROMs and
other components easily. You can email me for advise if required, just make sure
you take some photos of your PCB so I can see the components clearly, or at
least have some info about your PCB and EPROMs before you contact me.
If you have an EPROM image (a 'dump'), you may occasionally need to program
it to a real EPROM. You can identify the EPROM size from the dumped file.
Simply multiply the file size of the dump by 8. For example, if the dumped
file size is 524288 bytes (i.e. 512k), the ROM type to fit that in would be
a 27C040 (512k x 8 = 4M). The 2nd step is to look at your PCB and check the
number of pins for the EPROM you are concerned about. This is important
because in this case a 4M dump could also fit into a 27C4096 EPROM (4M 16
bit), but since that is a 40 pin ROM and in this example a 32 pin ROM is
needed, 27C040 is the correct type. See the table below for reference.
| # of ROM pins needed |
Image Size (dump)
in bytes |
EPROM type
to use |
| 24 pins |
1024 (1k) |
2708
|
| 2048 (2k) |
2716
|
| 4096 (4k) |
2732
|
| 28 pins |
8192 (8k) |
2764
|
| 16384 (16k) |
27128
|
| 32768 (32k) |
27256
|
| 65536 (64k) |
27512
|
| 32 pins |
131072 (128k) |
27010
|
| 262144 (256k) |
27020
|
| 524288 (512k) |
27040
|
| 1048576 (1M) |
27080 |
| 40 pins |
131072 (128k) |
271024 |
| 262144 (256k) |
272048 |
| 524288 (512k) |
274096 |
| 42 pins |
1048576 (1M) |
578200 |
| 2097152 (2M) |
27C160 |
| 4194304 (4M) |
27C322 |
Note! There are many, many equivalent types for the EPROMs listed in the
table above.
Refer to the ROMref.txt ROM cross-reference file for more info.
Lastly, have fun.... this isn't a job :-)
This article is Copyright 'The Guru' 2003-2050. The may not copy
any portion of this for your own web site or printed publication. |


